 PrintPiperOpen app
 SPREADSHEET PRINTING GUIDE
Generate Certificates from Excel or CSV with a Template
Generate certificates from Excel or CSV by placing reusable text variables on a PDF or image design. Save the template, import your completion list, and connect each recipient’s name, course, date and reference number. Download a PDF batch with a personalized certificate page for every row — a bulk certificate generator for training, workshops and courses, without Word mail merge.
For workshop and training organizers: reuse a completion-certificate design without editing every name by hand. This is a document-generation workflow. It does not email recipients, issue verified digital credentials or add cryptographic signatures.
Prepare the certificate design
Upload your existing blank artwork — a PDF or supported image with blank space for the recipient and course details. PrintPiper places text over that design; it does not edit the text already embedded in a PDF. Add four text fields with exactly one variable each — Name, Course, CompletionDate and CertificateID — and give each field an explicit width and height. Save the template before importing any list; for the exact field positions and styling, see the five-certificate worked example below.
The example uses a 287 × 200 mm Frame on A4 landscape paper, 297 × 210 mm, with a simple border. Use artwork whose proportions match the finished Frame and choose Fit inside. Printer margins belong to the paper outside the Frame; they do not resize the design. This example places the Frame centered at 1:1 inside 5 mm printer margins. Keep all ink inside the printable area. A single-page design is easiest to reuse for one certificate per person.
Prepare the exact wording to print
Use columns such as Recipient, Workshop, CompletedOn and Reference. Review completion eligibility outside PrintPiper, then import only the records you intend to certify. Dates and reference numbers are text supplied by your spreadsheet; PrintPiper does not invent dates or allocate unique certificate identifiers.
Format dates in Excel as you want them printed, recalculate any formulas, and save the workbook. For CSV, write the complete date text yourself. Use text values for reference numbers so prefixes and leading zeroes survive spreadsheet editing.
Generate certificates from Excel in bulk
Save the template first, then import the workbook directly instead of exporting a CSV: choose Import CSV / Excel, select the XLSX or XLS file, then choose the worksheet that holds the list and confirm its header row. The importer reads saved formula results and each cell's displayed formatting, so recalculate any formulas and format dates the way you want them printed before saving the file. Macro-enabled XLSM, XLSB and encrypted workbooks are not supported; save an unencrypted XLSX copy instead.
Keep one row per person: each row becomes one personalized certificate page, so a recipient attending three workshops appears three times.
Choose the output format and row range, then generate. Large output may split into PDF parts to stay within per-part page and pixel budgets, so watch the export progress and download every part before leaving the page. Part names come from the template and workbook names, not one file per recipient.
Map columns to variables
Connect each column to its template variable once per batch. If your workbook uses the same headers as the downloadable CSV example, Name connects to the Recipient column, Course to Workshop, CompletionDateto CompletedOn and CertificateID to Reference. Exact header matches connect automatically; the rest are mapped by hand.
From a CSV file instead
Already have a CSV export, or does another system produce the list as plain text? See generate certificates from a CSV file for the complete CSV workflow, including saving as UTF-8, quoting fields that contain commas, and mapping CSV headers to template variables.
Certificate numbers and references
PrintPiper prints the reference or certificate number stored in your spreadsheet; it does not allocate unique IDs on its own. Build the numbers in Excel with a fill series or a formula such as ="LP-"&TEXT(ROW()-1,"0000"), save the results, and import them as text. Keep the same numbering in your own records so a printed certificate can be checked later.
A five-record example you can reproduce
All names, businesses and records in this example are fictional. Five records fit within the Free plan’s 10-record export allowance. Sign in and save this as your active template before importing the data.

1. Create the design
Choose New template. Set the Frame to 287 × 200 mm and the Page to 297 × 210 mm at 150 DPI, with 5 mm printer margins on each edge. Choose one sheet, centered alignment, zero padding, bleed and crop marks off. Under Template artwork, click Choose image or PDF, add the blank artwork above, and choose Fit inside. Print on matching paper at 100%; the frame is placed 1:1, never scaled.
Text field positions and styling
Static wording is part of the deterministic artwork. Variable fields each hold exactly one variable; positions are measured from the upper-left of the Frame. Use transparent background, dark green text (#193b31), and Shrink text to fit. Preset is optional and under the editor's Preset control.
| Field / variable | X / Y (mm) | W × H (mm) | Type |
|---|---|---|---|
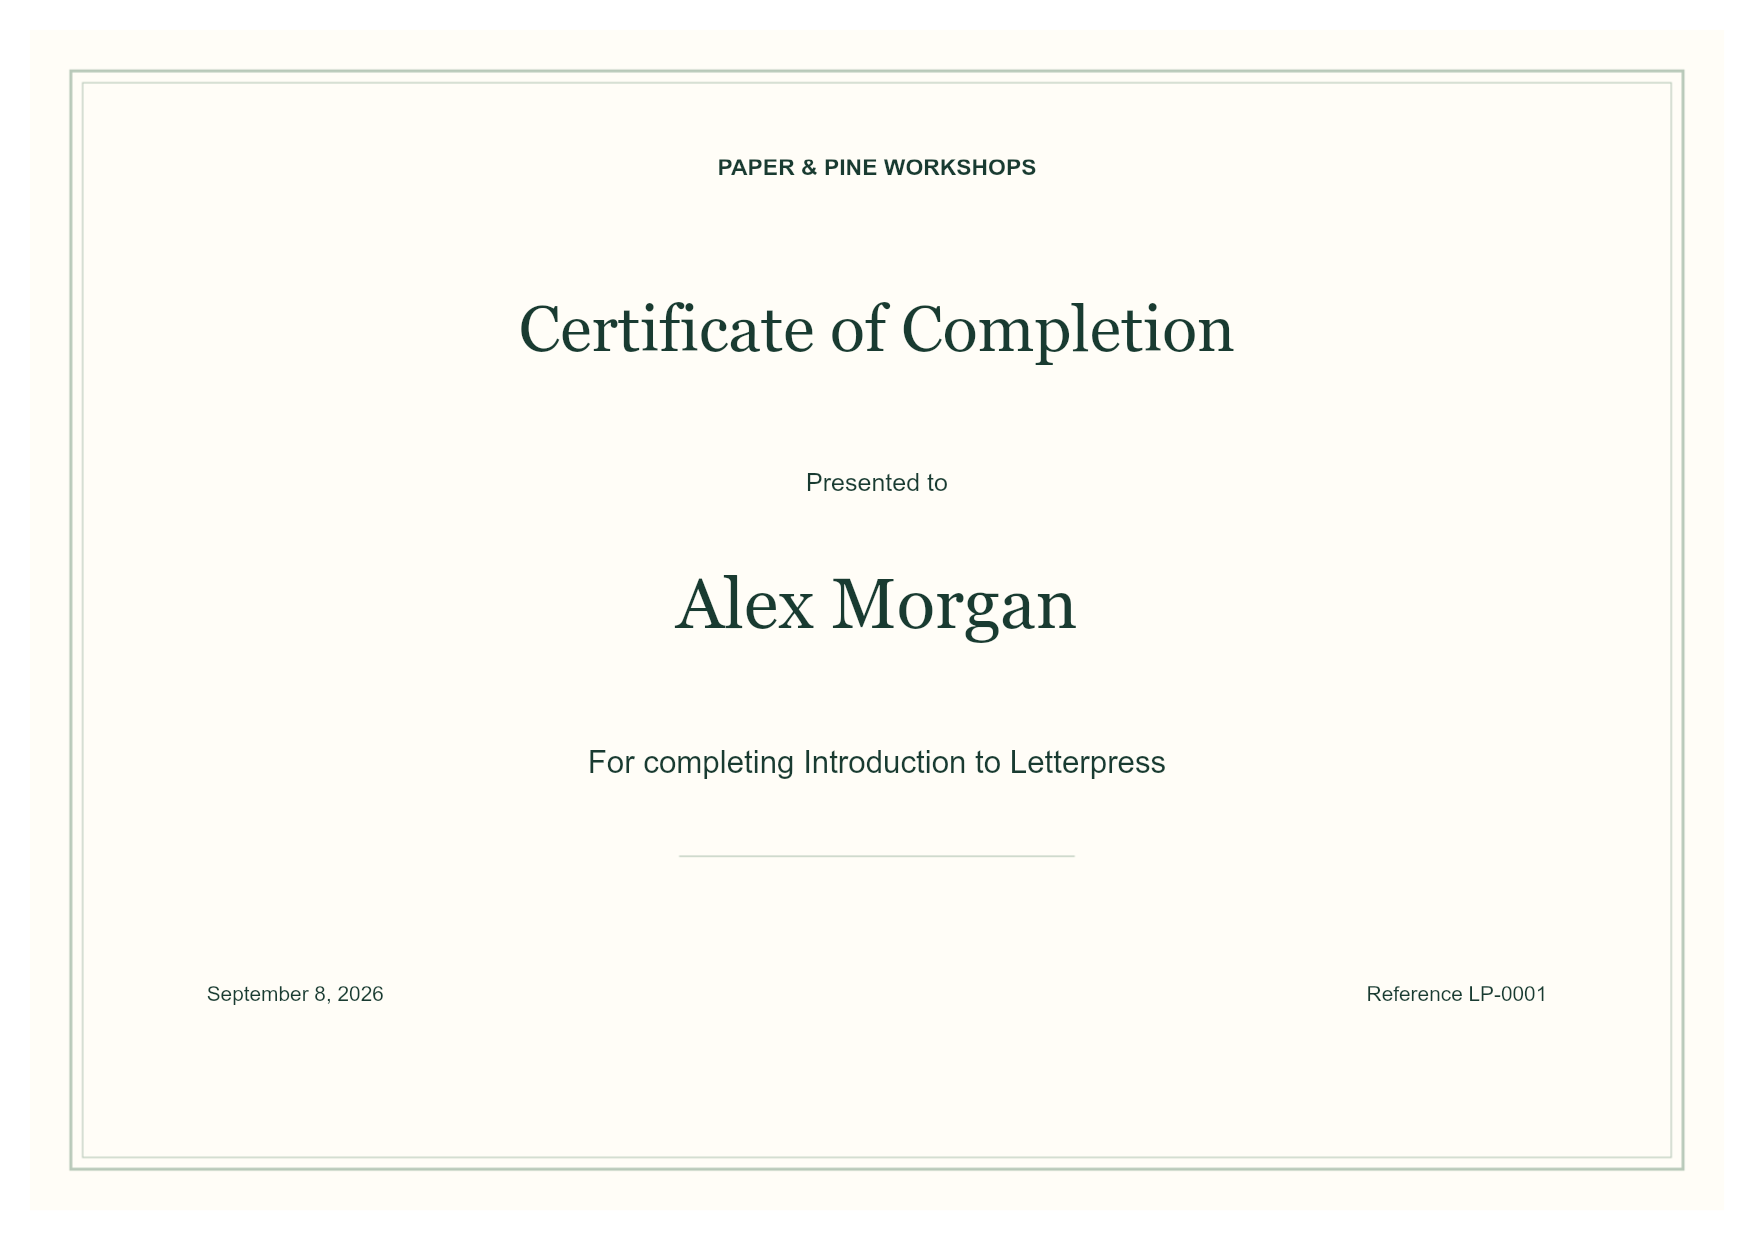
| Name {{Name}} | 30 / 97 | 237 × 20 | 34 pt Georgia, center |
| Course {{Course}} | 100 / 127 | 167 × 10 | 15 pt, left |
| Date {{CompletionDate}} | 35 / 167 | 130 × 9 | 10 pt, left |
| Certificate ID {{CertificateID}} | 208 / 167 | 54 × 9 | 10 pt, right |
Download full template settings for reference. Recreate these settings in the editor; template JSON is not an app import format.
2. Save, import and connect columns
Click Save template. In the right panel, choose Import CSV / Excel and select the example CSV. Under Connect columns, use the mapping below. Matching names connect automatically; the other connections are manual.
| Variable | Column | First value |
|---|---|---|
| {{Name}} | Recipient | Alex Morgan |
| {{Course}} | Workshop | Introduction to Letterpress |
| {{CompletionDate}} | CompletedOn | September 8, 2026 |
| {{CertificateID}} | Reference | LP-0001 |
Download the mapping reference. Connections apply to this batch and are not saved in the template.
3. Preview, generate and download
Select the first row, then the fifth row to check the longer values. Choose Print-ready PDF and rows 1–5, click Generate files, and wait for completion before clicking Download. The result is five pages, one for each record.
4. Test on the matching paper
Print at Actual size / 100%, with printer paper matching 297 × 210 mm. Measure one test print before using your final stock. This example uses one centered design per page; it does not arrange several certificates on a larger sheet.
Certificate generation questions
Do I need Word mail merge to generate the certificates?
No. Word mail merge is the traditional route, but PrintPiper replaces it: import the completion list into a saved template, connect the columns, and generate the PDF batch in the browser. Word does not need to be installed, and the recipient list is never uploaded.
Can I use a certificate designed in another app?
Yes. Export it as a PDF or image, then use it as shared template artwork. Leave variable areas blank. Cover existing template text can conceal a field rectangle, but may also hide decorative artwork beneath it.
Why is a recipient name too wide?
Preview the longest name before generating. The sample gives the name a wide centered field and uses Shrink text to fit. Adjust the field or typography and save again if the name looks cramped.
Are exported certificates editable or vector PDFs?
PrintPiper flattens pages through raster rendering before PDF export. Keep the source design and saved template for later changes; exported text is not selectable vector text. Use a suitable resolution and inspect small text before printing.
Does each person receive a separate file or email?
The example produces one five-page PDF. Larger batches may be split into several PDF parts to stay within per-part page and pixel budgets, rather than one named file per recipient. PrintPiper does not send emails; download the completed files and handle distribution separately.
Can I generate certificates from a CSV file?
Yes. Save one recipient per row as UTF-8 CSV, import it, and map the columns. CSV and Excel both produce one personalized certificate page per row; the CSV certificates guide covers UTF-8 encoding, quoted values and header mapping in detail.
How do I add certificate numbers or references?
Put the number in its own column and place a {{Reference}} field on the design. Generate the numbers in your spreadsheet before importing; PrintPiper does not invent or track them.
Can I create training certificates in bulk?
Yes. Reuse one saved certificate template and import each class or cohort list as a new batch. Select only the rows for the group you are certifying so the exported PDF contains exactly those recipients.
Use the Excel workflow for workbook import or the CSV workflow for text-file preparation.